
I'm blaming all of this on pregnancy. I woke up yesterday wanting fudge so bad. I decided to make it today because we had lots of family coming to celebrate my little girl's birthday, so I knew I'd have help eating it. I've actually never made fudge before. Mostly because it's something I really love and I didn't want to risk screwing it up. I found a recipe on this blog that I figured I could handle and it turned out amazing. Happy Sugar Rush!
Fudge
4 cups of sugar (shocking, I know)
1 can evaporated milk
2 1/2 cups mini marshmallows
Mix in a big pot and bring to a boil over medium heat, stirring often. Boil for 8 min. Remove from heat and add:
2 2/1 cups chocolate chips (I did half milk and half semi-sweet)
1 cup butter
Stir until mixture is melted and loses some of it's gloss. Add:
1 Tbsp vanilla
1/2 tsp salt
1 1/2 cup more mini marshmallows
Stir until marshmallows are melted. Pour into butter cookie sheet and cool. This made very thin pieces for me, just thinner than I am used to. Next time I might use a 9x13 pan instead.
Sunday, December 18, 2011
Monday, December 12, 2011
Shredded Beef Tacos
I’ve been slacking lately at keeping up with this blog, and if I’m honest with myself, most other things in my life. I haven’t spent much time baking or trying new recipes for the past few months since I believe it’s never in your best interest to try a new recipe in your first trimester of pregnancy. =) Now I’m feeling much better and I have a few good ones I hope to have posted soon. This taco recipe is one I originally found on Crockpot365. I really love her blog. I only made a few preferential changes to it and we really loved it. I hope you like them!
Shredded Beef Tacos
3-4 pound beef roast
1/2 cup brown sugar
1/3 cup soy sauce
6 cloves of garlic
1/2 onion, diced
1 Tbsp ginger
2 Tbsp rice wine vinegar
1 Tbsp sesame oil
1 half jalapeno, diced with seeds removed
Trim the fat off the roast and plop it in your crockpot. Then just dump the rest of the ingredients in however you want. Cover and cook on low for 8-10 hours. Shred the meat and stir to mix everything in well. It really is super easy. Serve in corn tortillas with lettuce, tomato, cheddar cheese and sour cream on top. Delicious.
Saturday, November 12, 2011
Pad Thai
We love Thai food. Whenever we go I want to try new things but also can’t resist ordering my favorite, Pad Thai. I think that problem is solved because this recipe tastes as good to me as anything I’ve had at a restaurant. Now I can eat Pad Thai at home and try new things when we go out. Win-win!! The long list of ingredients looked intimidating to me at first (especially the fish sauce…look for that near the soy and thai sauces at your grocery store) but it’s very easy to make. We liked it so much we ate it twice this week, so try it out!
 3/4 pound bean sprouts
6 ounces pad thai rice noodles
4 eggs
salt
3 tablespoons lime juice
3 tablespoons ketchup
1 tablespoon brown sugar
1/4 cup fish sauce
3 tablespoons sesame or extra virgin olive oil
1 tablespoon minced garlic
1 1/2 teaspoons red pepper flakes
2 cups grated carrots
1 tablespoon creamy peanut butter (optional)
2/3 cup chopped peanuts
1 cup green onions, thinly sliced
Bring pot of water to boil and prepare rice noodles according to package directions. Add the bean sprouts to the boiling noodles during the last minute of cooking. Drain noodles/beans and rinse with cold water.
Beat the eggs in a small bowl. Stir together the lime juice, ketchup, brown sugar, and fish sauce in a separate bowl and set aside.
Heat the oil in a large skillet (or wok) over medium heat. Fry the garlic for about a minute. Add red pepper flakes and carrot and stir fry for one minute, move to one side of the skillet. Add the beaten egg to the opposite side of the skillet and scramble. Once eggs have set, mix them with the peppers and carrots. Add peanut butter and mix in until melted. Add the noodles, sprouts, green onions, peanuts, and sauce. Toss and serve.
Pin It
PAD THAI
 3/4 pound bean sprouts
 6 ounces pad thai rice noodles
4 eggs
salt
3 tablespoons lime juice
3 tablespoons ketchup
1 tablespoon brown sugar
1/4 cup fish sauce
3 tablespoons sesame or extra virgin olive oil
1 tablespoon minced garlic
1 1/2 teaspoons red pepper flakes
2 cups grated carrots
1 tablespoon creamy peanut butter (optional)
2/3 cup chopped peanuts
1 cup green onions, thinly sliced
Bring pot of water to boil and prepare rice noodles according to package directions. Add the bean sprouts to the boiling noodles during the last minute of cooking. Drain noodles/beans and rinse with cold water.
Beat the eggs in a small bowl. Stir together the lime juice, ketchup, brown sugar, and fish sauce in a separate bowl and set aside.
Heat the oil in a large skillet (or wok) over medium heat. Fry the garlic for about a minute. Add red pepper flakes and carrot and stir fry for one minute, move to one side of the skillet. Add the beaten egg to the opposite side of the skillet and scramble. Once eggs have set, mix them with the peppers and carrots. Add peanut butter and mix in until melted. Add the noodles, sprouts, green onions, peanuts, and sauce. Toss and serve.
Pin It
Thursday, November 3, 2011
Silly Pancakes
This is my 4 yr old daughter's favorite breakfast. She loves to watch them bake into crazy bumps and bubbles. She started calling them "Crazy Pancakes" and it sort of stuck at our house. I have made these gluten-free several times, but this is the recipe that gave me the best results.
Silly Pancakes (German Pancakes)
Put the following ingredients into blender:
6 eggs
1 cup milk (I use vanilla soy and it's delicious)
1/2 cup rice flour
1/2 cup tapioca flour
1/2 tsp salt
Blend for about 1 minute. Meanwhile, place 3 Tbsp of butter in a 9x13in baking dish and set it in the oven while you preheat to 400 degrees. Keep an eye on it and pull it out once the butter is melted. When batter is well blended, pour into buttered dish and bake for about 20 min. Serve with maple syrup.
Wednesday, November 2, 2011
Kung Pao Chicken
I recently had my first experience with Kung Pao Chicken. The restaurant version was great, but this recipe I made at home was even better. I am a big fan of simple recipes. At first glance this seems a bit complex, but really it's simple. The steps are just broken down for my own benefit, so I don't screw-up. Dinner time is easily my hardest time of day as that's when I need to be paying attention to what I'm doing in the kitchen as well as the precious baby girl clinging to my legs. Anyway, try the Kung Pao. It's divine.

Prepare chicken marinade: Dissolve 1 Tbsp of corn starch in 1 Tbsp of water and then add 1 Tbsp of vegetable oil, 1 Tbsp of soy sauce, 1 Tbsp of rice vinegar, and 2 tsp of minced garlic. Stir well. Pour over chicken in a container, cover and refridgerate while you prepare the rest.
Prepare the sauce: Dissolve 1 Tbsp of corn starch in 1 Tbsp of water. Then add 2 Tbsp soy sauce, 2 Tbsp rice vinegar, 2 Tbsp sweet chilli sauce, 2 Tbsp brown sugar, and 1 tsp sesame oil. Stir to combine and dissolve the brown sugar. Set the sauce aside.
Prepare the veggies: Slice the peppers, carrots, zucchini and green onion.
Prepare rice: add 1.5 cups jasmine rice to 2.5 cups boiling water. Reduce heat and simmer for about 20 minutes. Fluff with a fork before serving.
Heat 2 T. oil in medium skillet. When it's very hot add white portions of the onions and cook for about 1 minute. Add marinated chicken and stir-fry until cooked through (about 5 min).
Add veggies and peanuts, cook for about 2 minutes. Add the sauce and cook until thickened (about 2-3 min). Serve chicken and veggie mixture over prepared rice.
Kung Pao Chicken

1 lb chicken (I used 2 frozen boneless skinless breast halves) cut into strips
3 tbsp olive oil
3 tbsp soy sauce
3 tbsp rice vinegar
2 tbsp corn starch
2 tbsp brown sugar
2 tbsp sweet thai chilli sauce (I used 3 tbsp)
2 tsp minced garlic
1 tsp sesame oil
2 green onions, diced. separate green pieces from white
1 medium green bell pepper (I did half green, half red), diced
2 medium carrots thinly sliced
1/2 cup zucchini, diced (optional)
1/2 cup unsalted peanuts
3 cups prepared jasmine rice
Prepare chicken marinade: Dissolve 1 Tbsp of corn starch in 1 Tbsp of water and then add 1 Tbsp of vegetable oil, 1 Tbsp of soy sauce, 1 Tbsp of rice vinegar, and 2 tsp of minced garlic. Stir well. Pour over chicken in a container, cover and refridgerate while you prepare the rest.
Prepare the sauce: Dissolve 1 Tbsp of corn starch in 1 Tbsp of water. Then add 2 Tbsp soy sauce, 2 Tbsp rice vinegar, 2 Tbsp sweet chilli sauce, 2 Tbsp brown sugar, and 1 tsp sesame oil. Stir to combine and dissolve the brown sugar. Set the sauce aside.
Prepare the veggies: Slice the peppers, carrots, zucchini and green onion.
Prepare rice: add 1.5 cups jasmine rice to 2.5 cups boiling water. Reduce heat and simmer for about 20 minutes. Fluff with a fork before serving.
Heat 2 T. oil in medium skillet. When it's very hot add white portions of the onions and cook for about 1 minute. Add marinated chicken and stir-fry until cooked through (about 5 min).
Add veggies and peanuts, cook for about 2 minutes. Add the sauce and cook until thickened (about 2-3 min). Serve chicken and veggie mixture over prepared rice.
Tuesday, November 1, 2011
Crockpot Potato Soup
My favorite part about this cold weather is busting-out all the soup recipes we love so much. This is one of my favorites. You can kind of play around with different ingredients and quantities so it's really easy.
Crockpot Potato Soup
Mix these ingredients in crockpot and cook on low for 6 hrs or on high for 4 hrs.
5 cups chicken broth
8-10 medium potatoes, peeled and diced
2 large carrots, peeled and diced
2 celery stalks, thinly sliced
1/2 medium onion, finely chopped
Salt & Pepper
Using a measuring cup, scoop about 2 cups of cooked soup from crockpot into blender and puree until smooth. Then pour pureed soup back into crockpot. This makes it really creamy without adding cream/fat. Then add any of these optional ingredients:
1/2-1 cup shredded cheddar cheese
2 slices bacon, cooked & crumbled
2 green onions, sliced
Sunday, October 30, 2011
My Favorite Fall Treats
We have been eating lots of fun fall treats this month. Most of them are already posted on this site, so I thought I would just give you some links to some of my favorites in case you are looking for some dessert ideas. I'm hoping that next week I'll get my favorite Pumpkin Chocolate Chip Cookie recipe posted. Let me know if you try something you like.
Saturday, October 29, 2011
Buttercream Frosting
I've been searching for a homemade frosting recipe that tasted great but also had a good consistency to use in a decorating bag. Found!!! This stuff is fabulous and pretty versatile. I used it on a cake a few weeks ago and then again on sugar cookies today. Delicious. If you make it just like the recipe says it's quite firm and easy to decorate with, but it thins out easily so it's more spreadable, too.

1/2 c butter
1/2 c shortening
1 tsp vanilla extract (I use almond extract...amazing)
4 c powdered sugar
2 Tbsp milk
Mix all ingredients with a mixer. To thin, add milk 1 tbsp at a time to desired consistency.

(I used Wilton's Sky Blue food coloring and bought that edible Tangled graphic on Amazon. It's not perfect, but my 4 year old loved it.)
Wilton's Buttercream Frosting1/2 c butter
1/2 c shortening
1 tsp vanilla extract (I use almond extract...amazing)
4 c powdered sugar
2 Tbsp milk
Mix all ingredients with a mixer. To thin, add milk 1 tbsp at a time to desired consistency.
Tuesday, October 11, 2011
Eleanor's Bake Shop

Monday, October 10, 2011
Pumpkin Pancakes
I’m sure I’ve mentioned before that I love all things made of pumpkin. When they turn out right. I’ve been looking for the right pumpkin pancake recipe and I think I finally found it! I made them for my family a few days ago and I instantly loved them. Imagine my disappointment when I asked my husband what he thought and his response was, “They’re…different.” Good-different? “It’s just like eating pumpkin pie for breakfast.” Umm, exactly. Some people don’t like dessert for breakfast. I am not those people. Whatever time of day you want to make them, they are fabulous. I got the original recipe at Baking Bites and converted it to gluten-free, so if you’re a gluten-eater, just use the original from their site. Happy Fall!
Pumpkin Pancakes
3/4 cup rice flour
1/2 cup tapioca flour
1/4 cup sorghum flour
1 tsp baking powder
1/2 tsp baking soda
1/4 tsp salt
1 1/2 tsp pumpkin pie spice
1/4 cup maple syrup
1/2 cup canned pumpkin
3/4-1 cup milk
1 tbsp oil (I used beans, of course)
1 large egg
1/2 tsp vanilla extract
In a large bowl, whisk together all dry ingredients. In a medium bowl mix all wet ingredients until smooth. Pour wet ingredients into dry mixture and whisk until well-combined. Heat a non-stick skillet to medium-high. Pour dallops of batter onto pan. Reduce heat to medium. Cook until golden and flip to cook the other side until golden. They may turn a little darker than regular pancakes, especially because they are kind of thick and need to cook a little bit longer. Serve with maple syrup.
I stored the leftover in ziplocks in the fridge for a few days. They heated up well in the toaster and they were a great snack straight from the fridge. I hope you love them!
Tuesday, October 4, 2011
Pumpkin Chocolate Cake
 October is my very favorite month. I love the whole thing. We celebrated it’s arrival this week with our first new fall recipe and boy, was it a good one! I love pumpkin but I wasn’t sure how I felt about the idea of a pumpkin chocolate cake. I’m a definite believer now. I originally found this recipe on Gluten Free Mommy, but I changed it a little to use the ingredients I prefer. I used to always just use store-bought all-purpose gluten-free flours in baked goods, mostly because recipes with lists of several flours was so intimidating to me. It worked okay. This year I’ve made a much more solid effort to branch out and try new things. I strongly suggest doing that if you haven’t already. For one thing, the store-bought all-purpose mixes are so expensive. For another, using other flours sometimes gives you much better texture. For example, I have fallen absolutely in love with sorghum flour. I don’t know all the science behind gf flours, but I can tell you that my cakes, breads, etc are so much better with sorghum flour. I’m so glad I finally tried that. Gluten-free baking isn’t nearly as scary as I always thought. Okay, lecture over, on to baking:
Chocolate Pumpkin Cake
2/3 cup tapioca flour
1/3 cup potato starch
1/2 cup sorghum flour
1 tsp baking soda
2 tsp baking powder
1 tsp xanthan gum
2/3 cup cocoa powder
1/2 tsp salt
1/2 tsp cinnamon
1 cup canned pumpkin
1/2 cup milk
3/4 cup butter, softened (I used pureed black beans….worked great)
1 cup sugar
1 cup brown sugar
3 eggs
2 tsp vanilla
Mix dry ingredients together and set aside. In your mixer, beat the butter (or beans) until fluffy. Add the sugars and mix well. Add the vanilla, then eggs, one at a time. Add the pumpkin and milk. Mix well. Slowly add the dry ingredients and mix until well incorporated. Pour batter into two greased 9 in cake pans. Bake at 350 degrees for 30-35 min (mine was done in 30). Remove from oven and cool ten minutes. Invert pans onto cooling rack and wait until completely cool to frost.
Oh, the frosting. It’s fantastic. But if you don’t have everything on hand, I think this one would be great, too.
Pumpkin Cream Cheese Frosting
4-5 cups powdered sugar (depending on desired consistency)
1/2 tsp vanilla
1/4 cup canned pumpkin
1/4 cup butter
2 tsp orange juice
1 (8 oz) package cream cheese, softened
Place all ingredients in mixer and beat to combine, but don’t overbeat.
I only frosted half, then froze the other half and the left-over frosting so we can eat again next week. Can’t wait.
Sunday, September 4, 2011
Banana Chocolate Chip Muffins
The original recipe for these muffins came from For the Love of Cooking. I made a couple of slight changes just to make it gluten-free and they turned out amazing! We all loved these so I didn't waste any time sharing the recipe with you.

Banana Chocolate Chip Muffins
1 cup rice flour
1/2 cup tapioca flour
1/4 cup corn starch
1/2 tsp xanathan gum
1 tsp baking powder
1/2 tsp salt
1 tsp baking soda
1/2 cup sugar
1/4 cup brown sugar
1 egg
1/2 cup of vegetable oil (I used pureed white beans)
1/2 cup of low fat vanilla yogurt
1 tsp vanilla extract
2 very ripe bananas
1 cup semisweet chocolate chips (I used mini chips)
Prepare a muffin tin with liners and spray with cooking spray. In a large bowl, mix the flours, corn starch, xanthan gum, baking powder, salt, baking soda, and sugars. In another bowl, mix the egg, oil, yogurt, vanilla and mashed bananas. Slowly combine the dry ingredients into the wet ingredients. Don't over mix. Add the chocolate chips and stir gently. Bake at 350 degrees for 20-22 minutes or until golden brown. Cool on a rack.
*I also did a pan of mini muffins which cooked in about 17 minutes.
**These are amazing with a little peanut butter spread on top. =)
Monday, August 29, 2011
Waffle Cookies
The other night my sister-in-law was talking about waffle cookies and I’ve pretty much been thinking about them ever since. I can’t even remember the last time I had waffle cookies, which is a shame, because they’re amazing and fun all at once. I found a recipe on allrecipes.com that I modified a bit to make them gluten free. I don’t remember what the “regular” ones even tasted like anymore, but these are so good! The frosting recipe is my favorite chocolate frosting ever, so it makes everything double-fantastic. Enjoy.
Gluten Free Waffle Cookies
1 1/2 c. white sugar
1 c. butter, melted (I used pureed beans and it worked great)
4 eggs
1 tsp vanilla extract
2 c. gf all purpose flour (I used 1 c. white rice flour and 1 c. tapioca flour)
1/2 c. unsweetened cocoa powder
1 c. chopped walnuts, optional (I have no idea why I didn’t add those)
Preheat waffle iron and mix all ingredients together. Drop dough onto by heaping tablespoons onto the center of the waffle iron. I actually just plopped a huge scoop right in the middle and it turned out great. Close the lid and cook for about 90 seconds. Watch them close so they don’t burn!
My Favorite Chocolate Frosting
8 Tbsp butter
4 Tbsp cocoa powder
1/3 c. skim milk
4 c. sifter powdered sugar
Melt butter in medium sauce pan on low. Whisk in the cocoa and milk. Bring mixture barely to a boil, stirring constantly. Remove from heat. Using an electric mixer, beat in the powdered sugar until thick and smooth. Pour warm frosting over cookies (or a cake, or whatever).
Saturday, August 27, 2011
Quick and Easy Black Beans
My kids are picky eaters, but they will eat just about anything in "bean form." This little fact means that we eat a lot of beans in our house. I'm ashamed to say that I used to just dump a can of black beans in a pan, warm them up, and call them a side dish. Sad. SO sad. I found this easy recipe on one of my favorite cooking blogs, Our Best Bites and I changed very little about it. This is now the only way I do black beans. Thank goodness.
Quick and Easy Black Beans
2 cans black beans (drained and rinsed)
1/2 T. olive oil
1 small onion, diced
2-3 garlic cloves, minced (I use the pre-minced, bottled stuffed)
2/3 c. chicken broth
1/4 tsp cumin
1/2 tsp oregano
1/2 tsp salt
1/4 tsp pepper
juice from 1 lime
In a sauce pan, heat the oil on med-high and saute onions until clear. Add garlic and saute for another 30 seconds. Add beans, broth and seasonings and bring to a boil. Reduce heat and simmer for about 10 min or until the beans are as soft as you want. Add the lime juice and serve. They do thicken as they stand, so if you want them thicker just remove them from heat and wait a few minutes before serving.
Friday, August 26, 2011
Lemon Rice with Pine Nuts
This is a great recipe I got from my Ward Cookbook. It's one of our favorite rice dishes. I love to make it with this Tilapia recipe. I was tempted once to make it without the pine nuts...mostly because I'm super cheap. Thankfully my husband wouldn't stand for it so he picked some up on his way home from work. They really do make a big difference. Definitely try this one out!
Amy's Lemon Rice with Pine Nuts
2 1/2 C. chicken broth (I used water and boullion cubes)
1 C. jasmine rice
2 Tbsp butter
1 small onion, chopped (I've used sweet, white, and red. All were good.)
1/4 C. pine nuts
3 Tbsp fresh lemon juice
1 tsp parsley
Salt & Pepper to taste
In a large sauce pan, bring chicken broth to a boil. Add rice, reduce heat and simmer for about 15 min. Remove from heat, set aside. In a medium skillet melt mutter over medium heat. Add onion and cook until clear. Add cooked rice, pine nuts, lemon juice, parsley, salt & pepper.
Thursday, August 25, 2011
Honey-Hoisin Chicken
My husband found this recipe in Parents' magazine. It's a real keeper. It was really quick and easy to throw together, but it also tasted delicious.
Honey-Hoisin Chicken
3 T hoisin sauce
1 Tbsp honey
1 Tbsp lime juice
2 Tbsp olive oil
1 lb chicken, cut into thin strips (I used to large breast halves)
3 C. cooked rice (I used Jasmine, my new favorite)
Heat 1 Tbsp oil in a large skillet. In a small bowl whisk together the hoisin sauce, honey, lime juice and 1 tbsp of oil. Set aside 1/4 cup of the sauce. Brush remaining mixture onto chicken strips and place them in skillet to cook. Allow to cook for about 3 min each side, or until cooked through. Serve chicken on top of rice. Drizzle with reserved Sauce.
Monday, August 15, 2011
Why I never should have taught my 3 year old why I can’t eat “gluten-free”
My little girl is very conscious about gluten-free food. When she was pretty little she was always trying to cram gold fish or cookies into my mouth so I had to teach her young that mommy just couldn’t eat them since they weren’t gluten-free. Today it back-fired. =)
We were in the car running errands and she asked for a drink. I passed her my water bottle and when she was done I asked for it back and she said, “Sorry, Mom. It’s not gluten-free.” I believe the translation is: “Sorry, Mom. I have no intention of sharing with you.” Kids…
Monday, August 1, 2011
Green Beans with Maple Dijon Vinaigrette
Last week I purchased my first “Bountiful Basket.” I was not disappointed at all. I think I’ll do that about once a month. It’s fun to get “mystery produce” and come up with ways to use it. I can’t wait to tell you about the bread I made with the sweet potatoes we got. Sounds ridiculous, I know, but it was amazing and you’ll love me for giving you the recipe. I was excited to get fresh green beans. I love green beans and my baby (okay, so she’s 19 months old now) would eat a whole can at one meal if we let her, but my husband only likes fresh. I’ve never really known what to do with fresh ones, but when they showed up in my basket I decided I better figure it out. I found this recipe on For the Love of Cooking and decided to give it a whirl. The girls weren’t that into it, but the adults overwhelmingly approved.
Green Beans with Maple Dijon Vinaigrette
1 tbsp olive oil
1 1/2 tbsp maple syrup
2 tsp cider vinegar
3/4 tsp Dijon mustard
1 clove of garlic, minced
1/2 lb fresh green beans
Handful of grape tomatoes, halved
2 tbsp sliced almonds
salt & pepper to taste
Combine oil, syrup, cider vinegar, mustard, garlic, salt & pepper in small container with a lid. Give it a good shake and let it sit while you prepare the beans. Place beans in a pot of boiling water and boil for about 4 minutes. Drain and drop into a bowl of ice water for about 1 minute. Drain again and place in bowl with almonds and tomatoes. Shake the dressing up again and pour it onto the beans, etc. Toss gently to cover and serve immediately. Delicious.
Friday, July 29, 2011
My New Favorite Pesto
I found this recipe on The Sister’s Café and decided to try it. It’s only slightly different from the one I used before but it was easily the best pesto I’ve ever had. We have basil growing like weeds in our garden right now so it was fun to put it to use. Our camera battery is dead so my husband took a picture with his phone. Not bad, right?

¼ c. pine nuts
3 T. minced garlic
5 c. fresh basil leaves, packed
1 tsp salt
1 tsp black pepper
1 1/4 c. olive oil
1 c. freshly grated parmesan cheese
Put the walnuts, pine nuts, and garlic in blender. Blend for 30 seconds. Add the basil leaves, salt, and pepper. While blender is running, slowly pour the olive oil in and blend until the pesto is finely pureed. Add the parmesan and puree for 1 minute. Serve immediately or store in the fridge. I didn’t even put oil on the top and it has stayed nice. We’ve eaten it on pizza and then tonight we put it on pasta. It’s amazing!
(Green Bean recipe to follow)

Pesto
¼ c. walnuts ¼ c. pine nuts
3 T. minced garlic
5 c. fresh basil leaves, packed
1 tsp salt
1 tsp black pepper
1 1/4 c. olive oil
1 c. freshly grated parmesan cheese
Put the walnuts, pine nuts, and garlic in blender. Blend for 30 seconds. Add the basil leaves, salt, and pepper. While blender is running, slowly pour the olive oil in and blend until the pesto is finely pureed. Add the parmesan and puree for 1 minute. Serve immediately or store in the fridge. I didn’t even put oil on the top and it has stayed nice. We’ve eaten it on pizza and then tonight we put it on pasta. It’s amazing!
(Green Bean recipe to follow)
Sunday, July 17, 2011
Birthday Cake
Today is my Birthday! I love Birthday’s.....and I love cake. What a combo! My husband bought me a gluten-free chocolate cake with cream cheese frosting from The Sweet Tooth Fairy. It was a splurge, for sure, but worth it. If you live in the area you should really try that place out. (Pardon my grainy-ness)


(My husband calls me “Ferger.” A story for another day…)


(My husband calls me “Ferger.” A story for another day…)
Tuesday, July 12, 2011
The one that put me on the map…
This is just a silly little blog where I like to keep my favorite gluten-free recipes. Mostly because, though I hate to admit it, I am getting flakier (word?) with age. This way, I can pull up my site and have access to everything I make on a regular basis. Someday I want to print them in a little book to keep in my kitchen, but I’ve got a ways to go for that. Anyway, last month a delightful person who will remain nameless (only because I have no clue who they are) posted about my blog on Facebook. Or something like that. I’m not on Facebook so I don’t know exactly how that went down, but my mom called one day to inform me that I was “famous” because she found a posting that referenced my blog and my Baked Pasta with Summer Veggies. What the crazy? I thought the two of us (my mom and I) were the only ones who even looked at this thing and the next thing I knew I was getting hits from over 400 places! Places I’ve never heard of like Willow Grove, PA or Belchertown, MA. Then places I HAVE heard of like Russia, Chile, and the UK. It’s been really fun for me to see where people are coming from, so please feel free to leave comments and let me know who/where you are. Thank you, mystery person, for telling people about my little blog. Last night I made the squash recipe that was referenced and thought I would post a little picture. I am terrible at food pictures, which is why there are few on this blog. How do you take a decent picture of a casserole-type dish anyway? Well, here it is. The Baked Pasta with Summer Veggies (complete with a plastic lizard in the background). I thought it deserved some recognition for making us new friends in 13 different countries. =) Thanks for coming by!

Wednesday, June 22, 2011
Raspberry Lemon Cupcakes
This is my new favorite treat. I've made these twice now and they are just amazing! I'm usually hesitant to try anything with filling because it sounds a little too complicated for me, but it really wasn't. The complication has been finding the right amount of xanthan gum. The first time I made these I forgot to use any and they actually turned out pretty decent but were very sunken-in. Once I added the filling you really couldn't tell, so you could try them that way. The second time I used 1 1/2 tsp, which I think was way too much but I actually really liked the end result. The batter was pretty "gummy" and the cupcakes baked up sort of deformed-looking, but the texture was incredible and once they were frosted they looked perfect. It was almost like an angel-food cake or something. It was fantastic. I think the next time (because there WILL be a next time :)) I will try 1tsp or a little less of xanthan gum and see what that does. Maybe by then I'll be decent at taking pictures of food and you can see them. Anyway...these are amazing and super easy! The original recipe came from the Cupcake Blog.
Raspberry Lemon Cupcakes
Cupcakes
1 c butter, room temperature (I used pureed white northern beans...takes away just about all the fat!)
2 c sugar
4 large eggs (room temperature)
2 3/4 c gluten free all-purpose (I used 2 c Blue Chip Featherlite, 1/2 c tapioca & 1/4 c sweet sorghum...that's what I had on hand)
1 tsp xanthan gum
1 1/2 tsp baking powder
1/8 tsp salt
3/4 c milk
1/4 c fresh squeezed lemon juice
zest of one lemon
Preheat oven to 350 degrees. Beat butter on hight until soft (again, I used beans and skipped that step). Add sugar and beat until fluffy. Add eggs. In a seperate bowl, whisk dry ingredients together. Slowly add dry ingredients to butter mixture and mix well. Slowly add milk combine well. Add lemon juice and zest. Scoop into cupcake papers that have been sprayed with cooking spray (about 1/2 full). Bake 20-23 min or until tooth pick comes out clean. Cool completely on cooling rack. Once cool, add filling and frost. See below:
Raspberry Filling
Smuckers "Simply Fruit" Raspberry Spread
When the cupcakes have cooled, spoon about half a bottle of raspberry spread into a frosting bag with skinny tip. Poke about half way into the center of each cupcake and squirt until top begins to rise (I think it ends up being about 1/2tsp per cupcake)
Lemon Cream Cheese Frosting
1 stick butter, room temperature
6oz cream cheese (I used fat-free)
1 1/2-2 c powdered sugar
1 T fresh lemon juice
1/4 tsp lemon zest
Beat butter and cream cheese until creamy. Slowly add powdered sugar to desired consistency (I used slightly more than 2 cups). Add lemon juice/zest. Beat to combine.
Monday, June 20, 2011
Dreams Do Come True…

I am SO excited about the new Gluten-Free Rice Krispies! As soon as I found them (I got mine at Wal-Mart) we ran home and made Rice Krispy Treats. They were amazing. I have to say, since switching to a gluten-free diet it’s little things like a good old Rice Krispy Treat that I miss the most. =) I’ve tried the crispy brown rice cereals from health food stores and I never liked any of them, but these were so good! Plus, it was really fun to make these with my daughter for the first time. Her favorite color is blue and if you look close you can see her little blue sprinkles. Anyway, if you haven’t tried them out yet, you really should! They look like this:

Spanish Rice
This is the side dish I like to make with my Honey Lime Enchiladas, or just about any other Mexcican recipe. I love this rice and this is a quick, easy recipe.
Red Spanish Rice
2T oil
1/4 medium onion
1 1/2 c rice
3 cloves finely chopped garlic (I use the bottled stuff)
2 1/2 c gf chicken broth (I used 2 1/2 c water and 2 gf boulion cubes)
1 c tomato sauce
1 tsp parsley (dried)
In a sauce pan heat oil on medium heat. Saute onions onions until clear. Add rice and stir-fry until it's a light brown color (5-ish minutes), add garlic. Add tomato sauce and broth (VERY SLOWLY!!). This will sizzle and splatter a bit, so be careful (and wear an apron :)) Stir well and bring to a boil. Once it boils, reduce heat to low and add parsley. Cover and simmer for 20 min.
Sunday, June 19, 2011
My Favorite Enchiladas
I originally found this recipe on Sister’s Café. I love that blog. This is one of my favorite meals. It’s really simple, it makes 2 pans so I can freeze one for later, and it’s delicious.
Honey Lime Enchiladas
1.5lb chicken (I use 2 large chicken breast halves), cooked and shredded (I do mine in the crockpot)
Sauce:
1/3 c honey
1/4 c lime juice
1 Tb chili powder
1/2 tsp garlic powder
2 (10 oz) cans gluten-free green enchilada sauce
1 1/2 c equal parts shredded mozerella and shredded cheddar mixed together
Corn tortillas
Combine sauce ingredients and pour over chicken. Allow to sit for about 30 min. Pour small amount of sauce into 2 (9x13) pans to cover bottoms. I like to wrap 5-6 tortillas at a time in a wet paper towel and microwave for about 45 seconds so they roll easier. Fill tortillas with about 2T chicken mixture and sprinkle with cheese (I usually do at least a tablespoon or so in each tortilla). Roll and line them up in the pans. Pour remaining sauce over the enchiladas and top with cheese. Bake at 350 for about 25 min, then turn broiler on and cook until tops looks brown and crispy.
Monday, May 23, 2011
I made bread!
I am really excited that I have just made my first ever, successful, made-from-scratch gluten-free bread. I didn't get a picture before we ate half of it, but I'm going to post about it anyway so I don't forget how I did it. First I would like to say, that I have always been against recipes that call for 7 different flours and 19 total ingredients. It's just not my thing. However, after years and years of paying way too much for gluten-free bread (and usually just going without) I decided I needed to bite the bullet and do it. I needed to find a good "from scratch" recipe to help save money, and hopefully it would taste good. Now that it's been tried I'm planning to make several batches of the dry ingredients in ziplocks so that all I have to do is grab the bag and add the wet stuff (because I've always been a lover of "mixes"). I found this recipe on glutenfreemommy.com and tweeked it just a little. Also, I did mine in the bread machine so if you don't have one, read her post on how to bake it in the oven. Okay, here we go...
Delicious Gluten-Free Bread
Combine dry ingredients in medium bowl:
1 C. brown rice flour
1/2 C. gf oat flour (can sub with quinoa flour)
3/4 c. millet flour
1/2 c. tapioca flour
1/3 c. corn starch
1/3 c. sweet sorghum flour
1/4 c. flax seed meal
1 tbsp. xanthan gum
1 1/2 tsp. salt
3 tbsp. brown sugar
Mix wet ingredients sparately (my machine calls to put wet in first, then dry on top)
3 eggs
1 tsp cider vinegar
1 tbsp molasses
4 tbsp. melted butter
1 1/4 c. hot water
Put wet ingredients into machine, pour dry on top. Make a small well in dry ingredients and add 1 packet dry active yeast. Use gluten-free setting on bread machine, this takes about 1 hr 20 min. It raised great and tastes fabulous!
Tuesday, April 19, 2011
My New Favorite Banana Bread
People. I tried the most bizarre thing ever, and it was a total success, so I wanted to share. A few nights ago a friend at work showed me this blog. This woman reveals an amazing secret (at least it was news to me...). Oil can be substituted in baked goods with BEANS!! Yes, beans. Stay with me, now. Here's what I did: I made this recipe and instead of 1/2 c. oil, I used 1/2 cup white beans pureed with water. She shows you how to do it on her blog. I opened a can of beans, drained them, filled them back up with water and them tossed it in the magic bullet. You just switch it out, cup for cup. You would never guess. It tasted fabulous, and I felt so much less guilt eating half of it in one day. =) Imagine the decrease in fat, and all that extra protien and fiber!
Yogurt Banana Bread
1 cup sugar
1/2 cup oil (or go crazy and use pureed beans/water)
2 eggs
1 cup mashed ripe bananas (about 3 ripe bananas)
1/2 cup plain yogurt
1 teaspoon vanilla
1 1/2 cup gluten-free all purpose flour
1 tsp. xanthan gum
1 tsp. baking soda
1/2 teaspoon salt
1/2 c. walnuts (optional)
Heat oven to 350 degrees and grease a loaf pan (or use 3 small loaf pans). In a large bowl, beat together sugar and oil. Add eggs, bananas, yogurt and vanilla. Add flour, baking soda and salt; stir just until dry ingredients are moistened. Pour into prepared pan. Bake at 350 degrees for about 60 minutes (about 40 minutes for smaller loaf pan) or until toothpick inserted in center comes clean. Cool 5 minutes; remove from pan. Cool completely.
Monday, April 18, 2011
Rolled Ham & Cheese Omelet
This is what we ate for Sunday dinner last night. =) It was so easy and we all loved it! The nice thing about this recipe is that while I am a plain, “ham’n’cheese” type person, you could really add whatever veggies or meat you wanted as a filling.

Rolled Ham & Cheese Omelet
4 ounces cream cheese, softened
3/4 cup milk
2 tablespoons flour (I use GF all purpose)
1/4 teaspoon salt
12 eggs
2-1/4 cups shredded cheddar cheese, divided
2 cups finely chopped fully cooked ham (or sausage, bacon, sautéed veggies, etc)
1/2 cup thinly sliced green onions (optional)
Line the bottom and sides of a greased baking sheet with parchment paper and set it aside.
Add cream cheese, milk, flour, salt, and eggs to a blender and mix well. Pour into prepared pan. I pull the top oven rack out and set the pan down, then pour it in, to avoid spilling it everywhere.
Bake at 350° for 15-20 minutes or until eggs are puffed and set (the gluten-free version didn’t “puff” nearly as pretty as the regular, but it was set). Remove from the oven. Immediately spread cheese and ham, reserving about 1/4 c. of cheese.
Roll up from a short side, peeling parchment paper away while rolling. Once I got mine started, I actually just pulled upward on the parchment and the omelet rolled itself. Super easy. Sprinkle top of roll with the remaining cheese; bake 3-4 minutes longer or until cheese is melted. Slice into 12 rings and serve.
Tuesday, April 5, 2011
Broiled Tilapia
This is a recipe I found a few weeks ago on Sister's Cafe. It was pure heaven. Try it out.
Broiled Tilapia
1/2 cup Parmesan cheese
1/4 cup butter, softened
3 T mayonnaise
2 T fresh lemon juice
1/4 tsp dried basil
1/4 tsp ground black pepper
1/8 tsp onion powder
1/8 tsp celery salt
2 lbs tilapia fillets
Preheat broiler. Grease broiling pan or line with foil. Combine parmesan cheese, butter, mayonnaise, and lemon juice. Add basil, pepper, onion powder, and celery salt. Mix well and set aside. Place fillets on prepared pan. Broil a few inches form the heat for 2-3 minutes. Flip fillets over and broil for a few more minutes. Remove from oven and cover with Parmesan cheese mixture. Broil for 2 more minutes or until topping is browned and fish flakes easily with a fork. Do not overcook. Serve immediately.
The best thing happened to me today...
I went to the Sweet Tooth Fairy and had one of their new gluten-free cupcakes. Oh my word. It was so dang good! They just started making gluten-free cupcakes, brownies, and cookies this month and they all look amazing. Their French Macarons are also gluten-free and they are just to die for. I'm a huge Sweet Tooth Fairy fan. I love a good, "cute," treat every now and then so I love this place! Go try it!
Sunday, March 27, 2011
Bake Sale Brownies (Aka: BEST BROWNIES EVER!)
Tonight my cute sister-in-law made the most fabulous gluten-free brownies. She actually used the America's Test Kitchen Bake Sale Brownies recipe, but just switched the flour for gluten-free. They were so amazing! Definitely worth a try.
Bake Sale Brownies
8 tablespoons unsalted butter, diced
3 ounces unsweetened chocolate, chopped
1 cup sugar
2 large eggs
1 teaspoon vanilla extract
1/2 teaspoon baking powder
1/4 teaspoon salt
2/3 cup gluten-free all-purpose flour
Preheat oven to 350 and move an oven rack to the middle position. Grease an 8in square pan (or line w/ foil). Melt the butter and chocolate together in the microwave, stirring often, for about 1 to 3 minutes. Let the mixture cool for a few minutes. Whisk the sugar, eggs, vanilla, baking powder, and salt together in a large bowl until combined. Stir in the melted chocolate mixture until smooth. Stir in the flour until well mixed. Pour batter into prepared pan and about 22-27 min, or until a toothpick comes out clean.
Thursday, March 24, 2011
Tikka Masala
Phil & I only recently discovered how much we like Indian food. It really is fabulous. I’ve been looking for a recipe for Chicken Tikka Masala (my favorite Indian dish) for a while now, but usually they’re quite complicated or consist of 17 ingredients I don’t even own. This one was meant for me. The only thing I had to go buy is cayenne pepper. It was really easy to make and it turned out amazing. Phil said it tasted “real,” which I think meant that next time we go out for Indian Food I’ll try something else, because this is just as good as what I could buy there. Just a warning, I made this last night and my kitchen still smells like it today. Well worth it, I might add.
Chicken Tikka Masala
1 cup plain yogurt
1 tablespoons lemon or lime juice (I used lime)
2 teaspoons ground cumin
1 teaspoon ground cinnamon
1/2 teaspoon cayenne pepper
1 1/2 teaspoons paprika
2 teaspoons black pepper
1 tablespoons minced fresh ginger (I used ground)
1 teaspoon salt
3 boneless, skinless chicken breasts, cut into thin strips or chunks
Combine all ingredients except chicken. Pour sauce over chicken and marinate in the fridge for at least an hour. Grill or cook chicken in frying pan. Discard marinade.
1 tablespoon butter
1 clove garlic, minced
1 jalapeno pepper, finely chopped
2 teaspoons ground cumin
2 teaspoons paprika
1/2 teaspoon salt
8 ounces tomato sauce
1 cup cream
1/4 cup chopped fresh cilantro
Melt butter in large skillet over medium heat. Saute garlic and jalapeno for one minute. Add the seasonings. Stir in tomato sauce and cream. Simmer on low heat until sauce thickens, about 20 minutes. Add cilantro and grilled chicken and simmer for 10 minutes. Serve over hot rice.
And maybe open a window. =)
Monday, March 21, 2011
Coconut Curry Noodles
I got this recipe from Mel’s Kitchen Café and we loved it! It was really easy and tasted fantastic. Here is the recipe as adapted by Mel:
Cocnut Curry Noodles
2 boneless, skinless chicken breasts, sliced into thin strips
1 tablespoon oil
2 cans light or regular coconut milk
1 tablespoon red curry paste
1 tablespoon freshly grated ginger
1 tablespoons chopped fresh cilantro
¼ cups sweet Thai chili sauce
2 ¼ cups chicken broth
1 (13.5 ounce) package rice noodles (about ¼-inch wide)
1 yellow onion, sliced into thin half moons
2 red peppers, cored and sliced thinly
1 cup broccoli slaw or thinly sliced matchstick carrots
1 teaspoon salt to taste
Heat 1 Tbsp. oil in a pan and add the curry paste and ginger. Let this simmer, stirring constantly, for about one minute.
Add the chicken and onions. Cook, stirring occasionally, until the chicken is no longer pink, about 5-6 minutes. Add the coconut milk, sweet Thai chili sauce, cilantro, and chicken broth. Bring this to a simmer.
Add the red pepper, carrots and rice noodles and salt. Simmer, stirring occasionally to prevent the noodles from sticking to the bottom, for about 5-8 minutes. The noodles will thicken and plump up as they absorb the liquid. The mixture will be slightly soupy when the noodles are finished cooking.
Take the pot off the heat and let the noodles sit for about 5 minutes. The mixture will continue to thicken.
Thursday, February 17, 2011
Blueberry Breakfast Cake
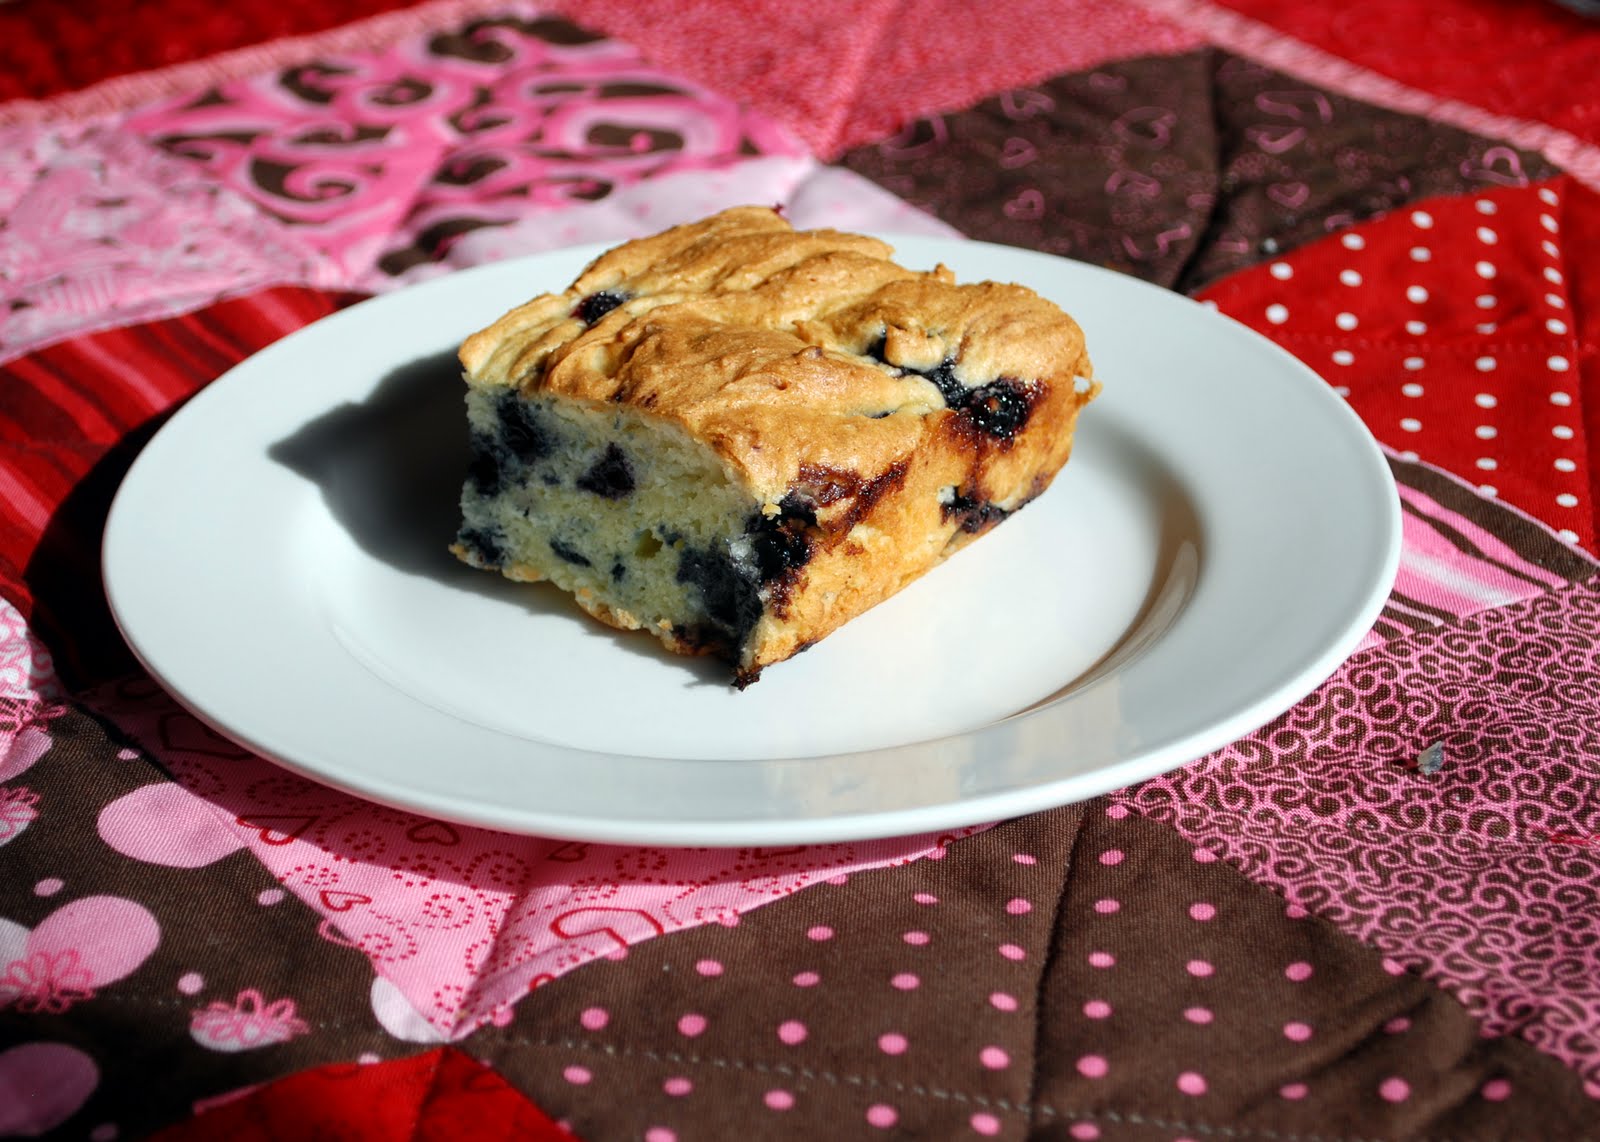
I found this recipe while gluten-free-blog-stalking the other night and knew it was meant to be. I changed very little about it. I've been c raving some kind of blueberry-baked-deliciousness and this looked like the cure. I made it for our Valentine's Day breakfast and I was amazed by how good it was. It has almost an angel food texture and it's just pure awesome. It was delicious hot and it was just as good right out of the fridge the next day. This is really worth trying. I'm excited to try other recipes from the Gluten Free Mommy.
Gluten-Free Mommy's
BLUEBERRY BREAKFAST CAKE
4 eggs, separated
1 3/4 cups sugar
1 cup butter or butter substitute, softened (2 sticks)
1/2 teaspoon salt
1 Tablespoon vanilla extract
3 cups gluten free flour, reserve 1/2 cup to mix with blueberries.
2 teaspoons baking powder
2 teaspoons xanthan gum
1 cup milk
10-12 oz. fresh or frozen blueberries (I used frozen)
DIRECTIONS:
In a medium bowl, sift together the dry ingredients (except sugar). Reserve 1/2 cup of your flour mix to mix with your blueberries. In a separate medium bowl, beat 4 egg whites until stiff. In a large bowl, cream the butter until light and fluffy. Add sugar gradually. Add vanilla. Add egg yolks and beat until well blended. Add 2 1/2 cups of flour mix and 1 cup milk alternately until throughly combined. Fold in egg whites. Mix the 1/2 cup reserved flour with blueberries. Fold in blueberry mixture. Pour into greased cake pan. Bake for 50-60 minutes at 350 a toothpick comes out clean.
In a medium bowl, sift together the dry ingredients (except sugar). Reserve 1/2 cup of your flour mix to mix with your blueberries. In a separate medium bowl, beat 4 egg whites until stiff. In a large bowl, cream the butter until light and fluffy. Add sugar gradually. Add vanilla. Add egg yolks and beat until well blended. Add 2 1/2 cups of flour mix and 1 cup milk alternately until throughly combined. Fold in egg whites. Mix the 1/2 cup reserved flour with blueberries. Fold in blueberry mixture. Pour into greased cake pan. Bake for 50-60 minutes at 350 a toothpick comes out clean.
Wednesday, February 16, 2011
Amy's Finnish Soup
My friend Amy brought this soup in to work a week or two ago and between the amazing color of it and the report that her family all loved it, I decided it was something I needed to try. It absolutely did not disappoint! This soup was so good. Katie ate as much as she could fit in her little belly. We loved it.
Finnish Soup
1 head of cauliflower, chopped
3-4 potatoes peeled chopped
1 large purple onion, chopped
4-5 carrots peeled, chopped
*I also added one yam, peeled and chopped. Amy said it was also good with butternut squash.
Put in a large stock pot with about 8 cups of chicken broth (enough to cover veggies) and salt and pepper.
Cover with lid and cook until veggies are really soft, about 30 min. Puree soup in blender a little at a time. Return to pot and put in 1-8 oz. block of low-fat cream cheese. Heat until melted and smooth!
Monday, January 17, 2011
Fudgy Brownies
Last night we were craving sugar. Phil specifically wanted brownies. I’m a big fan of mixes, but I didn’t have a gluten-free one so I decided to try making some from scratch. It was a risky move when we were so desperate for something delicious, but it turned out rather amazing! This is a recipe that I HIGHLY recommend trying out. It sounds way more time consuming than it really is.
Fudgy Brownies
1/4 c. almonds, ground fine in food processor (I used the incredible Magic Bullet)
1/4 c. gf oats, also ground fine
1/3 c. rice flour
1 c. semi-sweet chocolate chips
6 tbsp butter
1/2 tsp salt
3/4 c. sugar
1 tsp vanilla
2 eggs
1 c. walnut or pecan pieces (I left these out, but I bet that would be delicious!)
Preheat oven to 325 and generously grease 8x8 pan. Combine ground almonds, oats, and rice flour, set aside. Place the chocolate, butter, and salt in a sauce pan and melt on stove-top over low heat. Stir constantly and remove from heat when the mixture is smooth. Cool for 5 min. Add the sugar and vanilla. Add eggs one at a time. Add flour mixture and stir until moistened. Stir in nuts if you’re using them. Scrape batter into pan and bake about 25 min or until a tooth pick comes out moist but clean.
These are delicious warm (we ate them with vanilla ice cream) but were equally amazing when they were completely cooled the next morning (yes, morning. Don’t judge me).
Subscribe to:
Posts (Atom)

